
First, create a new Flash File (ActionScript 3.0)

Right-click >> Document Properties. Set the stage to a dimensions of 560 px X 320 px with 24fps and black background color.

Click F5 at the 1440th frames to insert 1440 frames to the whole flash video, which is 1 minutes.Then, go File >> Import >> Import To Library. Import all the needed graphics and the song into library. Go to first frame and drag the song to the stage. The song is now imported to the stage. Change the layer name to "Song".

Create a new layer and name it as "Today".Press F6 at the 2nd frame to convert it into keyframe. By using Text Tool, type the word "Today" with Impact font and set it to suitable size. Set the color of the type to red color. Press F6 at frame 11th to ensure that the Motion Tween created later is applied between timeline 2nd-11th frames only. Click on the word "Today", right-click >> Create Motion Tween. Rearrange the type from the start keyframe to end keyframe to create a jumping from top motion effect.

Create a new layer, name it as "I". Convert frame 12th to keyframe and use Text Tool, type the word "I" with red color and Bell Gothic Std font. Press Q to access Free Transform Tool to change the position of the type to slightly lean to the left. Create a motion tween between frame 12th to 19th and apply blur filter with 20px (high quality) to the type at the first keyframe. Change the position of the type to normal and unable the blur filter at the end keyframe. The type is placed under the word "Today".


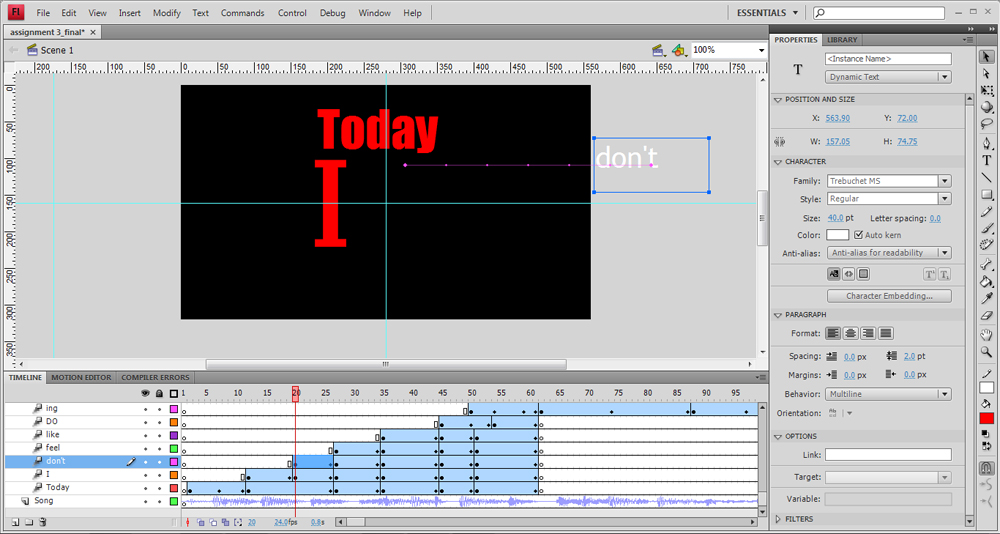
Create new layer, name as "don't" and type the word "don't" with white color, Trebuchet MS font.Create a motion tween start at 20th frame and end at 26th frame with a flying-in from right motion effect.
Using the same method as above, apply the same motion tween effect to the word "feel".

Using the same method as above, apply the same motion tween effect to the word "like". But, change the font type to Impact and using Free Transform Tool rotate it with 90 degree to the left. Change the font size to bigger at the start keyframe and smaller and fit to the space as show in figure at the last keyframe.

Create a new layer,name as "DO". Type the word "DO" with font Impact and white in color. Create motion tween as shown the following figure.

Create a new layer, name it as "ing" and type the word "ing" with font Impact and blue in color. Right-click >> Create a Motion Tween. Apply blur filter ( 25 px , Low quality ) to the start keyframe and 0px at the 53th keyframe.

*Please note that all the previous object are being apply motion tween as the motion showing in video while the next layer and object is being created.
Drop down the word "ing" by creating another motion tween. At the same time, apply the motion tween of fade-out to the upper-left corner to all the other words [Today, I , don't, feel, like, DO] by changing their font sizes, position and pixels of blur filter.

Create a new layer, name it as "Anyth". Type the word "Anyth" [ Font type : Tresbuchet MS ; Color : White ; Style : Bold Italic]. Create a fly-in from left motion tween.

In the layer of "Anyth" and "ing", convert frame 88th and 132th to keyframe to ensure the motion tween created later is only applied in this timeline. Open Window >> Motion Preset to open the window of motion preset. Apply the flyin-pause-flyout effect to the keyframe start at 88th frame for both layers.


Create a new folder and name it as "Part 1_A". Put the previous layers except the song layer into this folder.

To be continued...
No comments:
Post a Comment